To help you quickly get started with Raytac’s AN7002 Wi-Fi module and nRF5340 module, here’s a simple guide on how to set up the development and programming environment using AN7002Q-nRF5340 Demo Board(AN7002Q-DB-5340)and nRF5340 DK.
This article will cover the 4 sections below: 1. Hardware setup 2. Software Development Kit and Environment setup 3. Programming/Development 4. Flashing/Uploading firmware
When you start developing your firmware for your Nordic nRF52832 solution-based Raytac BLE module, you will (like on most other projects) bump into some difficulties.
The other day, we had yet another case where a simple thing caused major difficulties for even some of the brightest people – a customer couldn’t get their GPIO direction bit to work.
Although not too difficult to solve, it’s a common error that most customers end up having on our modules and that is because Pin 0.09 & 0.10 are set to NFC per Nordic’s default settings. In order to be able to use these pins as normal GPIOs, you will have to change those settings.
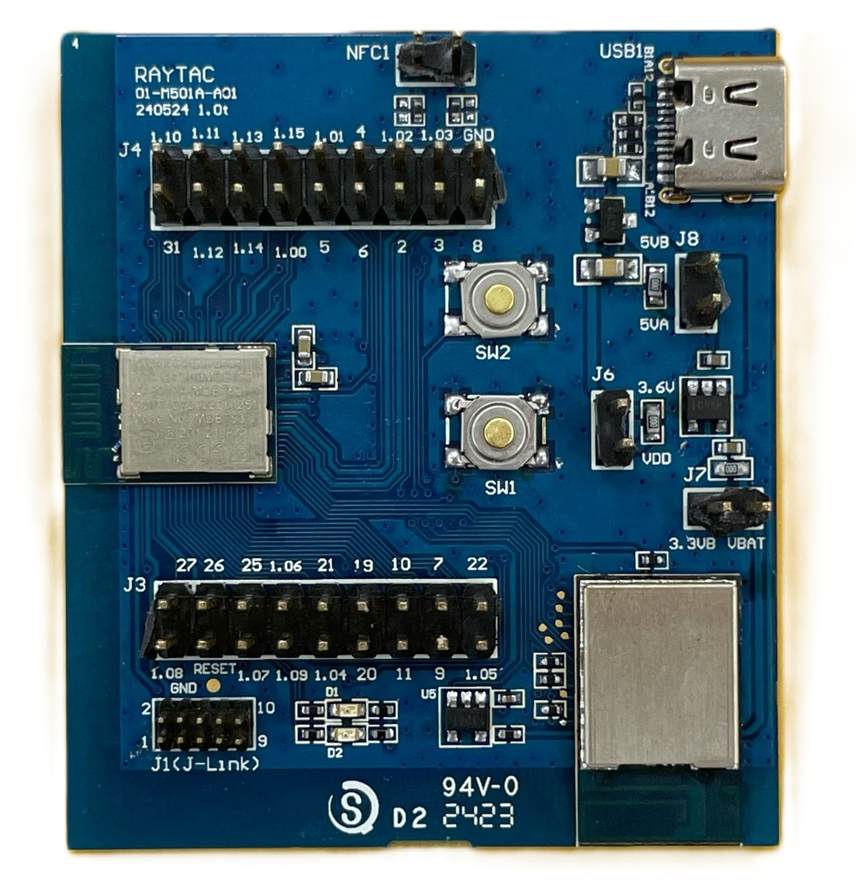
The two pins I am talking about are the ones linked to the NFC-part to the far left in the circuit example below:
So, to convert these two pins to normal GPIOs, here’s what you need to do:
In SES, you’ll need to add CONFIG_NFCT_PINS_AS_GPIOS.
Right-click on the project and click “Edit Options”Select “Common”, click on “Preprocessor” under “Code” and then click “CONFIG_NFCT_PINS_AS_GPIOS”
Check out the link below for a reference example on Nordic’s DevZone.
Setting up Nordic's IDE (Integrated Development Environment) is the first step into Bluetooth product development, and it's also where most developers need support.
In order for developers to be able to smoothly set up their IDE, Raytac hereby provide you with a few easy steps.
First and foremost - In terms of IDEs, there are currently four different ones that are all viable; Segger Embedded Studio (SES), Keil C, IAR and GCC. Among these, SES and GCC are IDEs free of charge while Keil C and IAR both require the developer to pay a license fee to their respective company.
We at Raytac generally recommend SES, as it is an IDE brought forth by both Nordic and Segger together and it uses Segger J-Link. Although GCC is a free IDE, it only builds code and is impractical editting make file or debugging firmware. Thus, it's not our primary choice.
Therefore, we will hereby provide you a step-by-step guide on how to set up your IDE when using SES.
11. Select "Open Studio Folder" in SES's File option, then select "External Tools Configuration". You may find the display as below screen shot. Pls paste the below command. (The command can also be found in below link)